Showing posts with label Pallet Projects. Show all posts

12.13.2016

Pallet Chest

Here's my first attempt at a pallet project from months ago. I never posted it, but it didn't turn out too bad

Originally this was going to be a different piece all together. But like I said, live and learn. It was an early attempt and I did not know all the tricks to working with pallets that I do now.


Here's a few things I learned, in no particular order, based on this attempt.

Choose the wood carefully. Pallets are so irregular that you can't just mix and match without some forethought. 

Buy a hand plane. Or an electric planer. Sanding takes a long time. You can really get a lot of the preliminary work knocked out in a short period of time if you plane the boards first.

A mulitool is worth its weight in gold. Those weird cuts and unforseen details, well, something like a Fein, or a SonicCrafter will make quick work of the problem.

Decide early what kind of look you want. Pallet projects can be anything you want. Rustic to fine finished. It really depends on what you want, the wood you are using and your skill level.

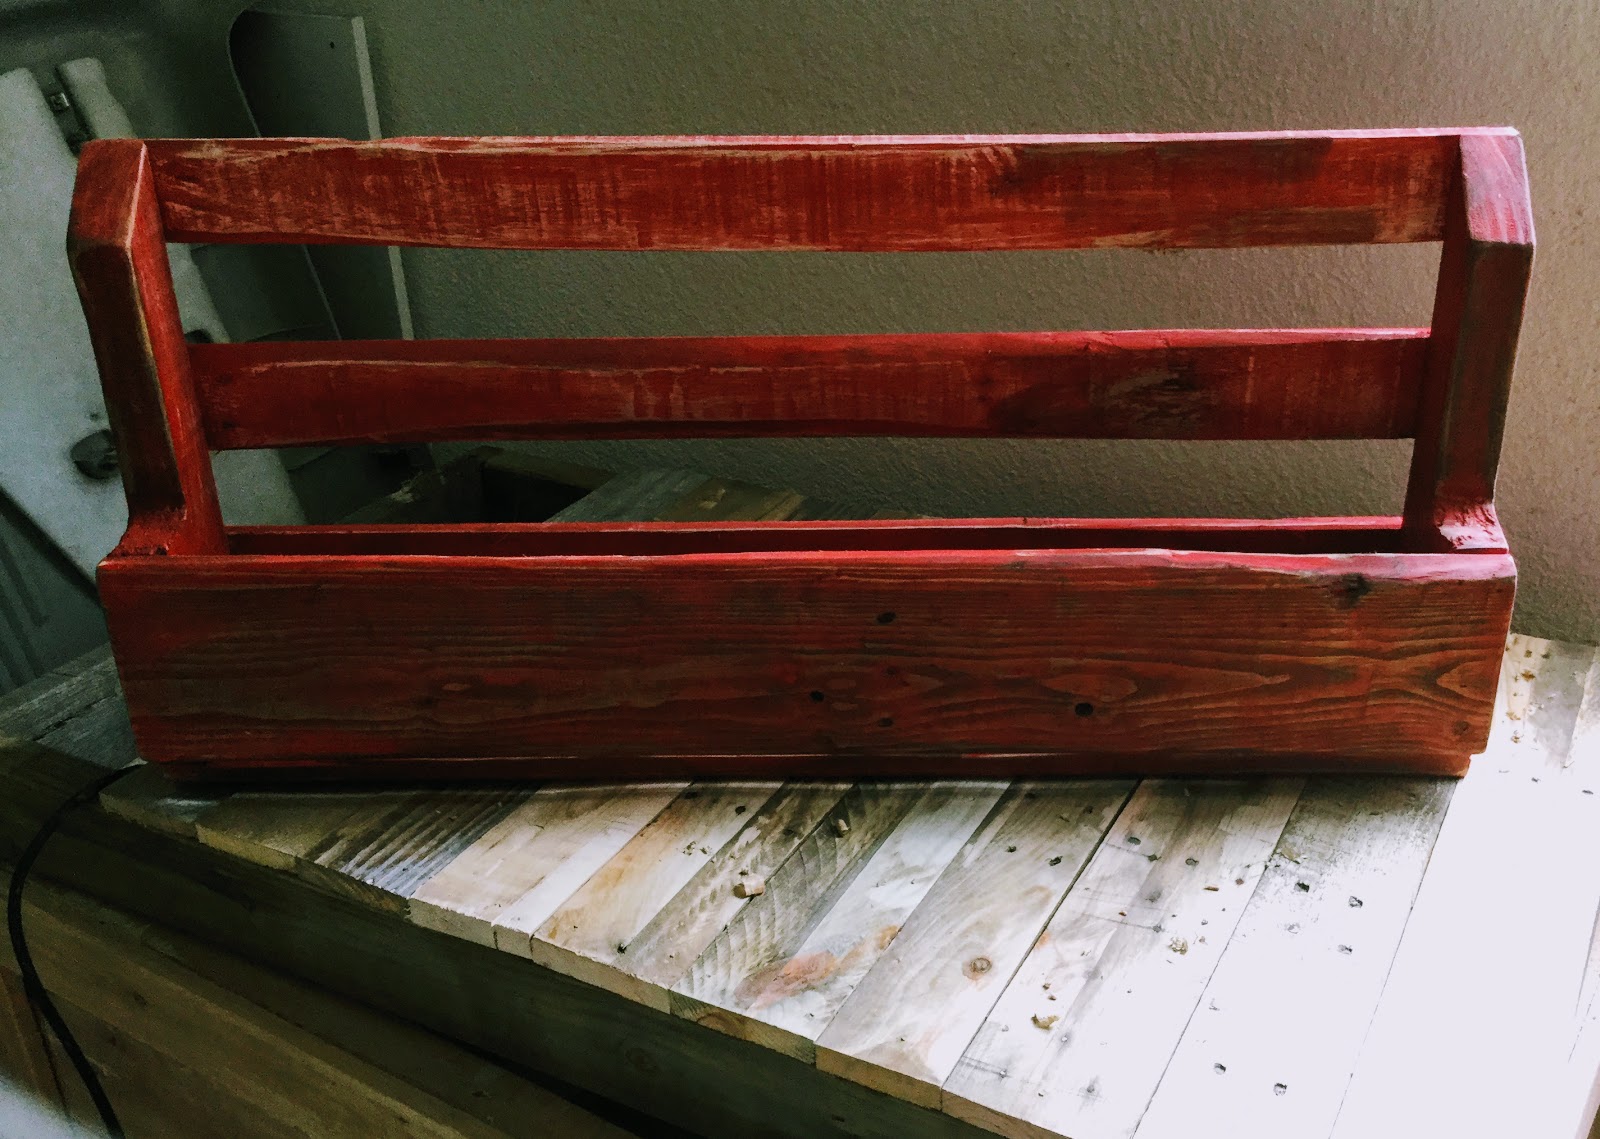
Staining is not as easy as it looks. Figure out a stain and an application method before hand. Test on scrap wood. I brushed on the stain, then brushed on another stain over top. Then I sanded it back down because it was just too dark. The final look really isn't bad, but I was a definite beginner in the world of wood stain before this project. Looking back I would have chose a different stain, and rubbed on with a rag to really get the look. It would have saved me a lot of time.

So even though I am not happy with the overall project, it does serve the purpose without being too much of an eyesore. It hides toys in the play room as a make shift toy box. With the lid closed, the dark color of the chest tends to hide in the room so to speak. So all in all, it is a win. Just not the win I had in mind. 

This particular box is about three feet wide and almost 2 feet deep inside to give you a frame of reference. It took wood from about 4 pallets, mixed and matched.  And that ties in with the final lesson learned: Have many pallets on hand. You never know what you will need for sure until you need it!


12.11.2016

Pallet Trunk Chest Update

Well like I mentioned, I am less than thrilled with the results of the top of the chest.  However I would be negligent if I did not at least show the project to this point. Keep in mind this is before any final sanding , filler and stain. Either way I'm pretty sure I will change it entirely before it's done. Here you go:


Saturday Update

Tonight was a tough one. Trying to get to work on the pallet trunk chest was just a non starter.

Not to say I didn't get some progress done. In fact, I did basically finish the chest, minus the final sanding and trim, and the stain. OH and the hardware for hinges and what not. So I guess the truth is, I finished the wood working portion. I just have to go clean it up.

I felt rushed, because I also put in a long day at work, came home, got the family settled and then headed out to the mancave, aka the garage, only to suffer from numerous interruptions. I hastily threw together the rest of the pieces needed on the chest, and began my final cuts. I broke one board after it was set. I cut too deep on another. All in all, I messed up.

So the challenge now is to do the true DIY thing and fix what I have in front of me.

The professional might scrap the project and rebuild it correctly. I think I can do enough sanding, carving and planing to hide the mistakes. So that's the route I am taking. Ill let you know how it comes out. Truthfully, I am not all mad. I used some really old pallet wood for the rest of it. But once I planed the boards down and scraped off the weathered outer layer of wood, the board underneath was something special. I think that alone will make up for the mistakes I made.

So that was tonight. I have my work cut out for me on my day off tomorrow. So expect some pictures soon. And you know what? The worst thing is not even that bad. Because I am learning all the time. The next project will come out even better. And the next. And you know I don't intend to stop making stuff.


On my way home from work I passed by some of the big box stores and drove my truck around back.  Filled my truck bed with new pallets to add to my stash. There are more projects in my future now. I have the material! I just need to make the time!


Now, on a not so great note: I did film two videos. Unboxing some new tools. But I currently don't have access to those because they are on my Ipad. And I am working off my computer at the moment.

However, I already began the editing in iMovie in order to put those two short videos together, and will be posting them on the blog soon.


So what else? I am just ranting, with no real objective in mind but to update on the project front.

I did use my new hand plane. It was not too bad. I'm still a fan of the bench plane, so keep that in mind if you are shopping for your first hand plane. Its not a bad size and shape for most beginner projects. And like I mentioned, once I ran the plane over some of those old boards, the beautiful wood underneath came through with the grains popping and the color shining. I am more than satisfied. Some good sanding will finish it up nice. All is well on that front.


Besides building my projects, which admittedly take much longer than they should, I have been writing. I have two other blogs that I am working on. Both of them I use the free platform from Blogger. I don't care if they get readers and I don't care if they get views. The real reason I have those pages up is for me to continue to work on ideas and work on my creativity. Like I told my son today. Do ONE idea each day. Doesn't matter if it sucks. Because You don't have to show anyone. But if you do one a day, eventually you will have that one great idea. And that could be your golden ticket.

It's akin to walking a hundred miles. It all starts with a step. Followed by another. Eventually you make it. But not without putting in the work first.

So like Malcom Gladwell said, ten thousand hours here we come!

I'm putting in the work. And at a minimum, I hope that by reading this blog you can be inspired to put that work in too.

Because you may have that great idea somewhere inside. That perfect project, or that masterpiece. But if you never start, we will never get to enjoy it.

So please keep creating!


I'm going to take a breather and finish tonight's drink: Sweetwater IPA. Not a bad beer for a Saturday!

Thanks for stopping by!


11.17.2016

Lighting Room With Pallet Decor

Here's a stained version of the candle sconce. I have made a few variations, but with the lights off and the candles lit, the room really feels warm with this pallet art. Enjoy


Pallet Kitchen Decor

Well a while back the wife said she wanted an Americana themed kitchen. It's a work in progress but this is her birthday week, so I had to make sure to get something done.

For this project I used wood from two different pallets and a dowel rod. I went back to using the forklift cutout pieces of the pallet to get that look on the struts of the rack.


You'll notice that the wood is less than perfect in a few instances, and that was on purpose. I wanted something that had the imperfections. Something that would look old and have the feel of something you might see in an old farmhouse. Or Cracker Barrel. Lol.

Stain was minimal too. A light stain rubbed on with a rag. I only used a brush to make sure seems and cracks got color on them.

As always, this piece is a little heavy, so four toggle bolts keep it in place on the wall.


Hope you like it. Leave me your thoughts and questions below!

11.02.2016

Rustic Wine Bottle Rack


Rustic Shabby Chic Bottle Rack
For the beverage connoisseur I made this little project. Total time, less than a day. Two days in all when you factor in the paint and sand job I did to give it the shabby look.


The pallets you find with the cutouts for forklifts are the best, because they give the variety to your strut boards. I mitred the ends off, and sanded them down just enough to make them smooth.

I purposely found wood that had a few nicks and blemishes so the whole thing would have that farmhouse look. I didn't want this to be anything but rustic. Not totally my style, but I can appreciate it. Also, I promptly posted this for sale so the end customer in mind who is looking for something like this is my target consumer.

All in all, it was as easy at it looks. I did take a bench plane to the face board to scrub it down so I didn't waste all day sanding it. A few passes with a sander and it was good to go. I also ran the plane over the edges at an angle to get that bevel look. Another few passes with the sander at they rounded out just right.

Next I took a can of apple red paint and poured it in a solo cup, added some water to thin it down to a stain and brushed it on.

Aside from the face board, I didn't sand much on the rest of the wood before I painted. I wanted to have something to sand off after the paint dried.

The thin coat of red looked great after it dried, so I took my oscilating tool with a medium sand paper and ran it over the wood.

The unsanded boards came out great, as the rough parts sanded off, the grain was left stained red, and a little wood is showing. I think that really made it pop.

I also sanded along the edges to expose some wood and really get it to look old and worn.

Usually I would say to sand by hand after painting but I think I managed to get a feel for using power tools with just enough pressure to get the look I wanted without going too far. .

A few hours down and I'm all set.

Here's the finished product


If you love it or hate it..leave a comment below!

10.31.2016

Where To Get Free Pallets

Pallet projects have become a passion for me lately. I have always liked woodworking but something about upcycling a beat up pallet is especially satisfying.

I always have about 10 pallets in my garage at any given time. And as I use them up, I'm on the prowl for new ones.

If you are getting started on pallet creations you might be wondering where to get them.  Not only that, but in most cases, one pallet is not enough. You will probably need to salvage pieces from multiple pallets to get the wood you need for any one project.

That's part of the challenge and part of the fun.


So where can you get enough pallet wood?

My go to source is behind stores. And I don't just take them, because I've learned that's bad etiquette. Some places prefer you don't take their pallets because they have an exchange in place. You'll be messing up their system.

So big box stores are usually a no go.

Smaller businesses are the best. They might have ordered some freight and just need to make the pallets disappear.

If I can catch an employee out back on break I'll ask if it's ok to load a few. If I get the green light, l load up my truck.

Through the course of the day I'll keep my eyes open for new places to salvage.  Better still if I see pallets next to a dumpster. That's a free for all. Plus, there might be other great pieces to salvage in the trash. Upcycling goes beyond pallet projects.


My second source is on Craigslist. There are plenty of people looking to clear out their business loading dock and need someone to take those pallets as a favor.

Make a mental note of the hotspots for salvaging. Apartment complexes dumpsters, the back of strip malls. Pretty soon you will have more material than you can handle. All that is left is to turn it into something awesome.

One of the best feelings is creating a piece from 100 percent salvaged material. It's almost a badge of honor.

Occasionally you'll need to buy some odds and ends to bring the project together. But in the spirit of keeping things green, challenge yourself to make your project from purely salvaged material.

Good luck! And send me some pics of your own work!


Candle Sconce

Here's a very quick project that's still pleasing to the eye.

A rustic pallet board wall sconce. Mount this in the location of choice and add some candles.

I didn't stain this piece, because the boards were so old and worn, I felt just a sanding would give the right look. Here's what I got:


The worn out, distressed wood gave it the beach house feel I was going for. Sometimes less is more.

Questions? Leave a comment!


Use the contact form in the sidebar if you'd like a custom piece made for you 


Free Website Visitors


10.27.2016

Pallet Trunk Chest-part 2

The trim on the outside of the trunk is coming together. In the pic you see it is still pretty raw, but it's a process. When you are using scrap wood it takes a little more time to really shape the boards.

I scrub plane and bevel the edges. This smooths out the wood, and makes sanding easier. Also, by trimming the sharp edges it gives the box a nice worn look.

For the gaps in the wood (there are a few, because the wood is irregular) I'm filling with putty. This problem could also be avoided if I squared up the edges with a table saw first. Maybe I'll try that next time. However the spaces in between the boards adds character. I only fill them so you can't see daylight in between.  Once I get everything sanded down it will really look proper.


10.26.2016

"Cleaning" a Pallet

As long as you're on my page, I'll share my jargon with you. "Cleaning" a pallet is what I say when I refer to stripping apart a pallet until it's a neat stack of individual boards.

I almost always strip a pallet apart even if the piece I am making is going to be put right back where it started. Reason being, pallets are rarely ever truly squared up. They get put together in a hurry and they are only meant to be functional. It's our job to make it pretty.

My main strategy to clean a pallet is a sawzall with a good blade on it. Slip that blade in between the wood and fire it up. It should cut those nails in half in no time. So to save time, stand the pallet on its side, and cut right along the frame. Flip it over and run the saw down the other frame. All that you are  left with is the center frame piece to remove. So get after it.

The other strategy I use is when the end pieces of the slats are so cracked and split that I know I would end up trimming them off anyway. So to save time, lay the pallet on the ground and grab a circular saw. Run the blade close to the 2x4 frame as you cut the slats. 20 seconds later you'll be just about  done.

I know the Pinterest boards are full of DIY folks who are just making gardens or a rough piece of furniture from their pallets, and they will tell you to use a hammer and a nail puller to separate the boards.

That's not what I'm doing and it's not what I recommend. You will ruin more wood than you salvage.

Start with those tips to strip down your pallets.

Clean 'em and check out my Pinterest boards if you need an idea of what to create!

Have fun with it. Leave me a comment below. Thanks for stopping by


New MOOD by Onnit

10.25.2016

Pallet Trunk Chest-part 1

Here's a piece I started, walked away from, and kept coming back for more. But it was worth it in the end. (Finished photos coming soon, this is just a teaser)


This is not the first pallet trunk I have made but I think this attemp will be different than previous incarnations. I tried a different structure and I also learned from previous mistakes. Aside from the time it takes to build, there is no real loss when it comes to botched pallet projects.   Materials are free, and the more I do, the better I get.

I found found a nice pallet with wide boards, and figure it would make a good face for a trunk. Something to go at the foot of the bed. You know, a place to hold extra blankets and throw pillows.

If you cruise through Pinterest boards or YouTube, you'll be bombarded with pallet trunks chests. Some are good. A lot are pretty bad.

The biggest problem I was seeing was that they were just slapped together. And for something
 I wanted to last, I really felt that the building process deserved a little more TLC.

I used those beautiful wide boards for the face of the box. It gave me that great look I wanted. But that wasn't enough.

Once the boards were in place, sanding just didn't do the trick. So I sharpened up my bench plane and ran it over the surface. It really brought out some nice surfaces under the weathered boards.

Just because the wood is old, does not mean the project needs to look like it's falling apart.

Plus, the seams where the pallet boards butt up to each other are now flush. You might notice when you set a pallet board, those edges can be warped or curved in a way that just won't lay flat. You can't blame the wood. It spent the first part of its life carrying a freight load of cornflakes to the supermarket.

It's my job to give it new life as something beautiful. So take note, a cheap plane will do womders for your project.


I filled some of the gaps and cracks with wood filler. One that I bought, and a homemade version that I made with sawdust and wood glue. I liked the result. After running the sander over it, it was like one smooth solid piece.

If you look inside you see I inlaid the box with boards running opposite to the direction of the outside face. Partly for the look, but it definitely gave the structure some strength. This thing is solid. .


10.24.2016

Quick Rustic Sign

Here's an easy one. Stencil a sign using a ballpoint pen.

It will leave an indent in the wood that you can paint or ink in.

This is a small one, but the same technique can be used on larger ones. A scrap board I had became the canvas.


Leave your comment below!


Alpha BRAIN by Onnit

10.21.2016

Clean Looking Pallet Creations

I poured over Pinterest and several Facebook pages that showcase pallet projects. One of my biggest frustrations is haphazard creations that are nothing more than raw pallet boards nailed into some shape or another.

My take is that using pallets is great because it's free material, it's environmentmentally friendly, and it can look great.

But it takes some effort.

Those boards can be rough, and getting enough good useable wood may take several pallets.

Stripping,(I call it cleaning) a pallet is the most tedious part of the process. I don't usually use a pry bar or anything like that because it only breaks the boards. A sawzall will cut between boards and chop the nails easily enough.


Free Twitter Followers

If your project will still look good with the nail heads in the boards, for example, a rustic chest, leave them in. But a lot of the time I will tap them out of the wood, and fill the holes before I'm done.

I also use a plane to scrub the top layer on almost every board. Followed up by some sanding, to really smooth out the surface. I don't mind grooves and grains and other irregularities showing in my projects. But I can't stand a board that hasn't been tuned up first.

Plane, sand, then fill those holes and seams. It will look good down the road.

Last tip: wood glue. Use it. Nails are great, but when I join boards, I want them joined for life. A bead of glue and some finish nails will do wonders.


So there you have it. I know every project is different and every person may have a different style in mind. So take my advice with a grain of salt. It's working for me.

I'd love to see some other creations. If you have one, feel free to post a pic and a link in the comments.

Have fun!

Bathtub Caddy Shelf

I wanted to complete the look that I started with the pallet towel rack that I made earlier.

With some extra pallet pieces and old shower hooks I put this together. It was a quick project, and most of the work came at the point of sanding and staining to get the distressed look I was going for.

I used the same driftwood stain from before. First coat brushed on lightly, to get into the grain. Followed by some sanding and rounding the edges. I rubbed some more stain on with a rag after that, followed by some hand sanding with fine grain paper.

The hooks are ceramic, so some Gorilla glue did the trick. Here it is, installed:


Update: I have received a few requests for this piece, and I'm happy to make more. Make an offer and let me know. Thanks for checking out my post 
-Nate


10.18.2016

Pallet towel rack

Keeping with the theme of pallet furniture I started this towel rack shelf unit for my sons bathroom. The old plain-Jane towel rack that came with the house just wasn't cutting it. And with the extra little bit of storage space above the towel rack it helps keep his sink top clear of all his supplies. I hate clutter. So win-win.

The dowel rod can be purchased but I scavenged for this one and lucked out, saving me an extra couple of dollars.

The side pieces came from a single pallet, and once I assembled the unit, I ran a sander over it with course grit. I didn't want to make it too smooth, because I preferred the aged look, but I don't want splinters either.

Here's what I had at the halfway point:


Also, because of the imperfect nature of the boards I found that a little wood glue mixed with sawdust makes for an easy filler in some of the gaps. All in all I'm pleased with the finished product.

 This could be painted or stained in any way that you like. It could work great in a kitchen as a bottle rack and towel rack, or in the bathroom for the amenities.

I went ahead and chose a stain called "dfiftwood". It had the look of aged wood, which was a plus. I also sanded over a few edges and surfaces after staining so it would have a more distressed look.

I mounted this piece above the tub using some heavy duty toggle bolts, hidden up high on the back plate.


Questions? Leave a comment. I also am taking orders if you'd like one made for you


10.13.2016

Getting Started on Pallet Projects


It was long overdue but i knew I needed to put down the excuses and pick up the tools.

The wife pointed me towards some Pinterest articles on pallet wood creations one day and I was hooked. First because I loved the idea of creating awesome stuff with up cycled material, and second because until then I thought Pinterest was just a site for soccer moms to swap meatloaf recipes.

Of course my ignorance was soon countered with the literal hundreds of guys, who, just like me, wanted to create and showcase their hobbies online and decided to use the site to showcase their work.

Cool. Point taken. I'm a jerk, and now I know better. 

So I grabbed the truck keys and drove around town to find some pallets for my projects. 

Note this: you can get pallets dos free. Check Craigslist. 

But for the sake of discussion, let's pretend I didn't do that and instead drove behind stores and shops like I was scoping out the place for a heist until I found decent pallets for what I had in mind.

And then let's pretend I grabbed them, threw them in the truck and hit the gas like a snatch and grab operation .

Not saying o dos that, but maybe someone else who looks like me did. Whatever. All I know is that I have a garage full of pallet wood that I using for my projects, and I am happy with it.


But for the sake of a healthy discussion let's look at how someone can get material for cheap without spending hard earned money that you need for regular life. After all, a hobby that sucks up your monetary resources is bound to drain you to the point where you'd have to quit that hobby in order to keep the lights on.  And that is a lose-lose.

I mentioned Craigslist. Start there. Under free stuff. Someone is always trying to u load something. Pallets are more common than you think. The best place to get them is from small shops that don't have big shipping contracts with freight carriers. They need those pallets gone, and without those corporate deals, every time they get a shipment, they are left with a pallet that no one is coming to get but that they need to get rid of. So take advantage. You'll be helping them out and in return you'll get some material for free.

On the flip side, a big box retailer usually has a contract with a carrier who is coming back for their pallets. If you take them, you'll be screwing up their deal and you might be explaining your hobby to Johnny law, so your best bet is to leave Walmart and Home Depot to their devices.

Stick with free. Everyone wins.

Have also had some luck in the trash. That's right. Dumpster diving.


If it's in the trash it's fair game. And just because it's on the curb does not mean it's unusable. There a be a great board or component that would work in your project in someone else's trash. 

That extra time you spend searching is actually saving you money. A few minutes scavenging a few minutes working? Spending that money you earned during the workday or spending some elbow grease on materials?

Figure out what works for you. But the stuff you find for free is some times perfect.


Adirondack style toybox bench


Pallet toy boxes are a good beginner project. They are good projects for any level craftsman actually. Better still if you have kids because once their play time gear is tucked away in the box, you are left with a nice looking piece of furniture in the house . Functional and pleasing to the eye.

Here's one I made for my 3 year old:


This was completely made from pallets. In total I used about 3 pallets to get the different boards needed to get the look on point.

Couple of techniques I used here include:

Wood filler to seal up some of the cracks and spaces between boards. Pallet boards are rough and irregular. Of course if you want a more rustic look don't stress in filling the holes.

Hand planing boards to get smooth even surfaces. I also went back over all the surfaces with a sander to really get the smooth glass like surface. The rough, rustic look is good for some projects but when a little girl is going to be sitting on this every day, I felt it was best to make it as smooth as possible to keep the sitting experience pleasant on her little bum.

Staining with a light stain and a rag to rub in the wood. Just enough color to give it a finished look, and using the rag instead of a brush gave me the control to keep from over staining or brush marks. I really just wanted a slightly darker color than the wood is normally. This came out pretty close to what I imagined when I planned this out.

I finished it up with several thin coats of clear polyurethane. This gave it a good deal for the inevitable spill that will happen when she's having snacks and drinks on her new bench. In between coats I sanded it down with super fine sand paper that is used for automotive paint jobs.

There is a couple of ways that I could have gone with the lid piece. Hinges came to mind but I finally decided to simply make the seat portion a removable piece so when she decides to get her stuff in and out of the box she won't be bothered with holding open a lid with one hand. Instead she can take the top off,  and then take her time digging inside to get the stuff out she wants.

For the back seat and the arm portions I measured then hand drew the lines where I wanted to cut the curving shapes. I used a plunge blade from an oscillating tool to carve it out, and the. Sanded rounding bevel edges to finish the look. It's slightly imperfect but I think it gives it the unique handmade look.